Getting started with the Sales Announcement Bar app
Once you’ve installed our app from the Shopify app store you will be up and running with your first banner in no time at all.
This guide will show you how to create your first banner.
On this page
Add a new sales banner
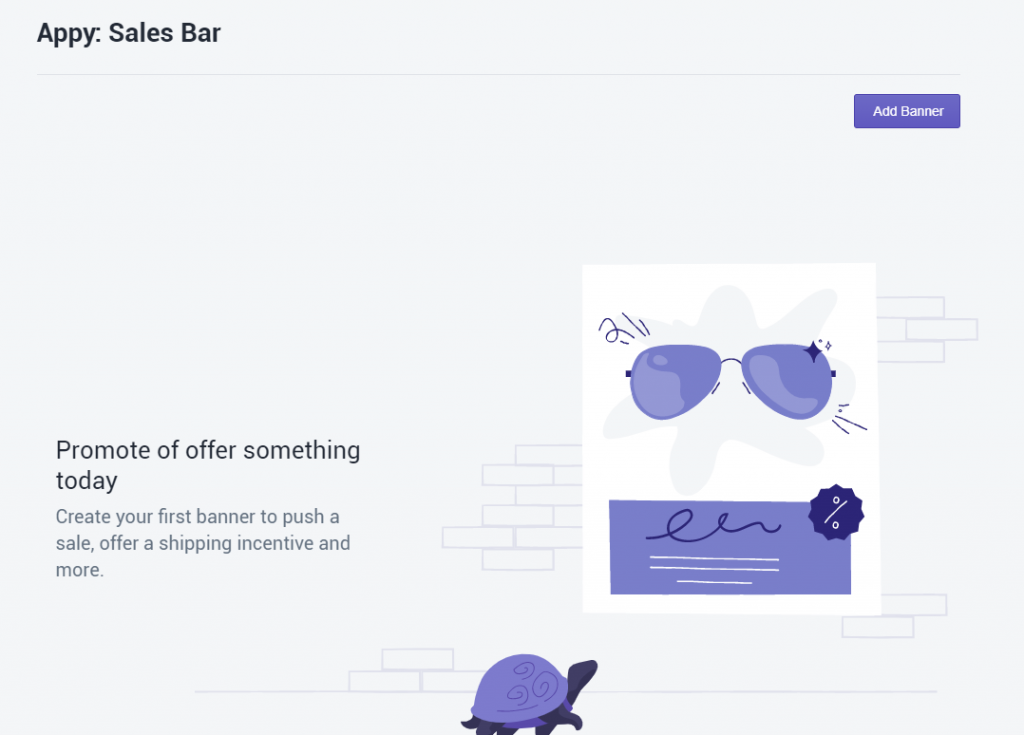
1. From the main page click on the Add Banner button.
2. Enter all the information you want for your banner
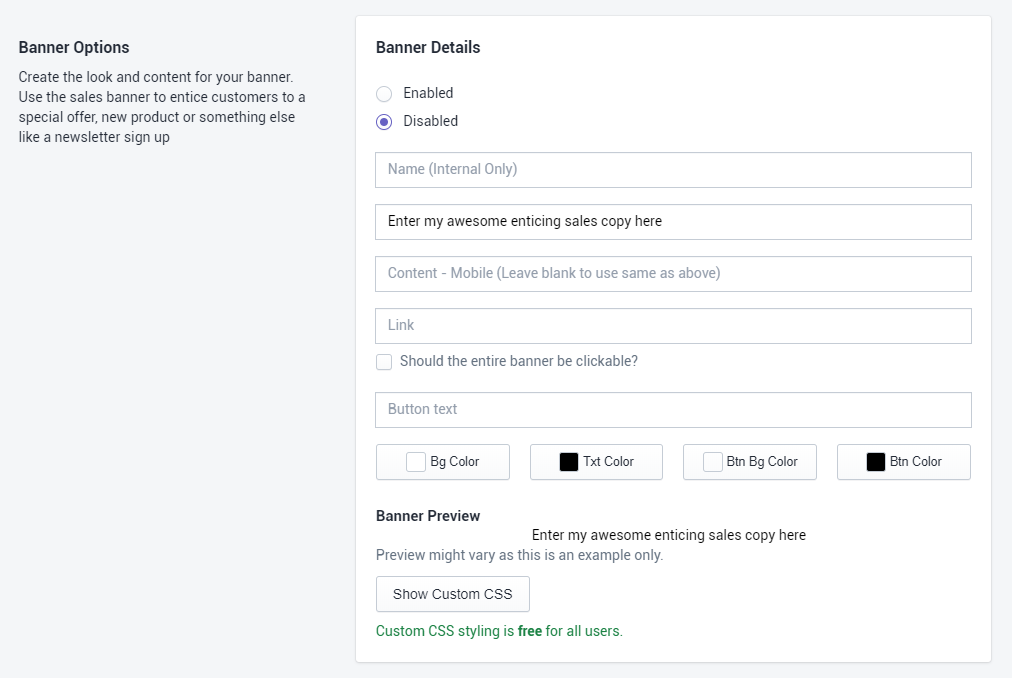
Enabled/Disabled: You can choose to activate your banner straight away or leave it inactive.
Name: This is an internal description for your banner, you can call this whatever you like.
Content: This is the text that will show up in the banner.
Note: You can also include emojis in your banner. Cool huh 👍
Link: Enter a link of the page you want the banner to go to. You can leave it blank if you want.
Should banner be clickable? Tick this box to make the entire banner clickable. If you leave this unticked, only the button will be clickable (if one exists)
Button Text: Enter the text to display on your button. Leave blank if you don’t want to show one.
Colour settings:
- Bg Color – select the colour of the background for the entire banner.
- Txt Color – select the colour of the text for the banner.
- Btn Bg Color – select the colour for the inside the button. To have no background you can select ‘Transparent’
- Btn Color – select the colour for the text inside the button.
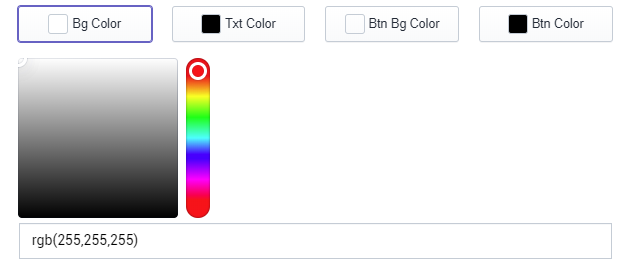
Note: you can select a colour from the picker or put your own rgb value in the text box
New: we have also added a HEX converter. So if you put in a hex code with the “#” it will automatically convert it to the correct RBG value.
Asking for customer email addresses
We all know how customer email addresses are important for any business and it is why you can ask for them to “sign up” in return for discount code or simple thank you for future “offers”.
Once on the edit banner page go to the Customer Acquisition section and tick “Ask for email address”
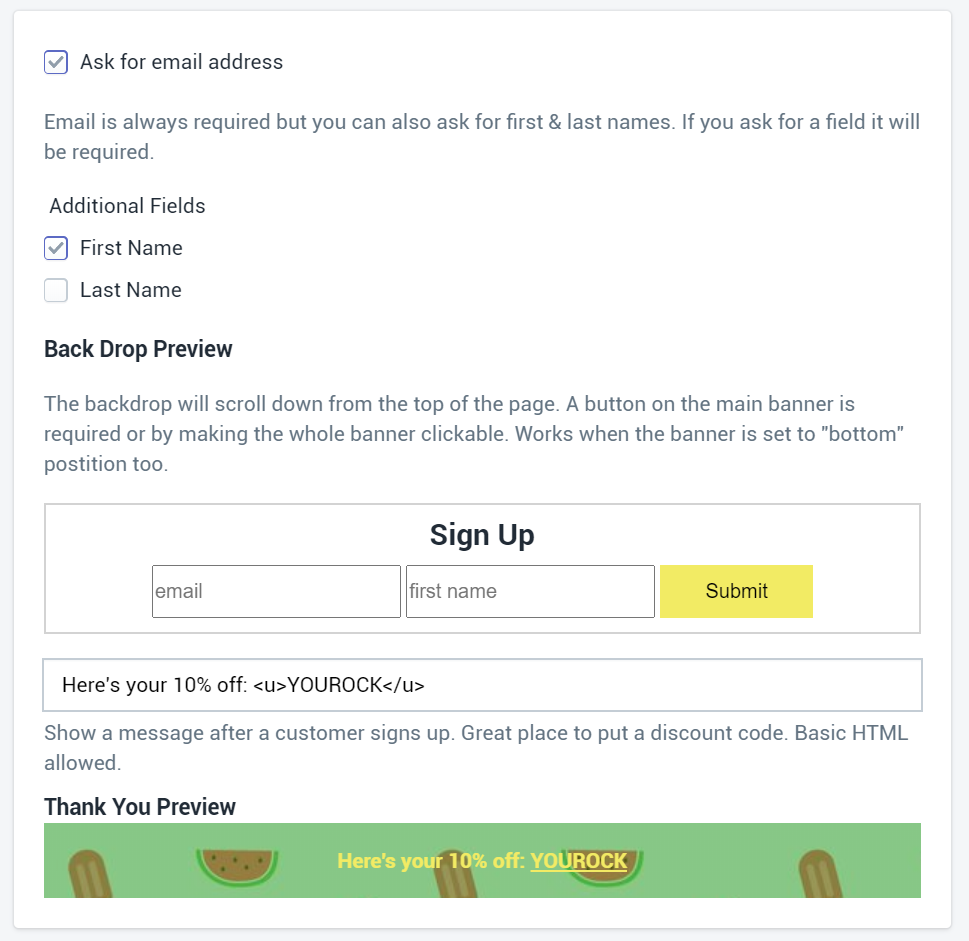
2. From here you can choose optional fields such as first name and last name to capture or leave them blank to ask for only an email address.
Tip: various studies have shown that the smaller the barriers to filling out any form the higher the change someone will. We recommend only asking for an email address first. Follow up later in an automated workflow through your email program to get more infomration.
3. The backdrop preview will give you a simple layout of what the form field will look like on the page.
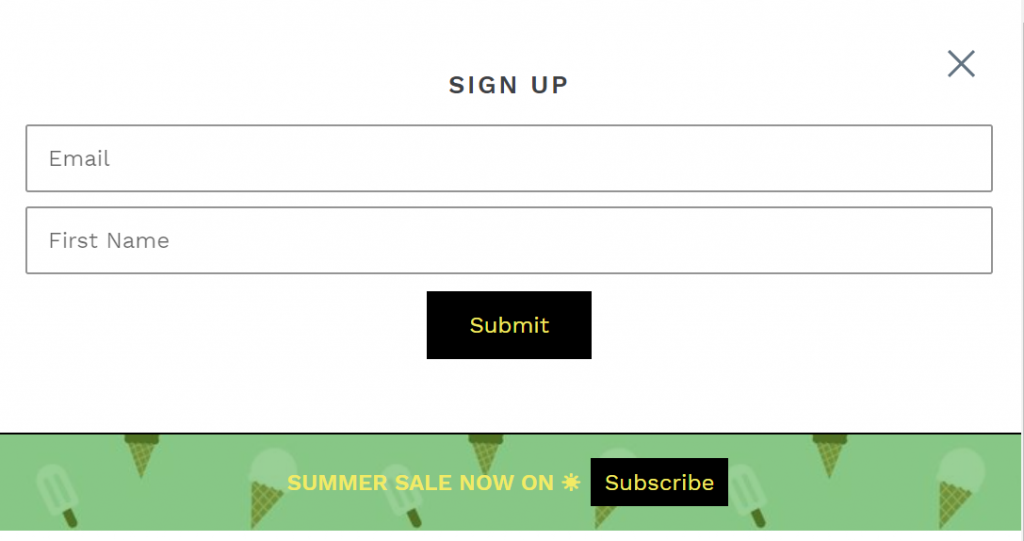

4. Finally, you can add a “thank you” or completion message which is a great place to reward the customer for filling out the form with a small discount or another offer.
Tip: you can also use basic HTML here as well. <u></u>, for example, would underline the text – useful for making it easier to spot what discount code. Links also work if you wish to push them to another page.
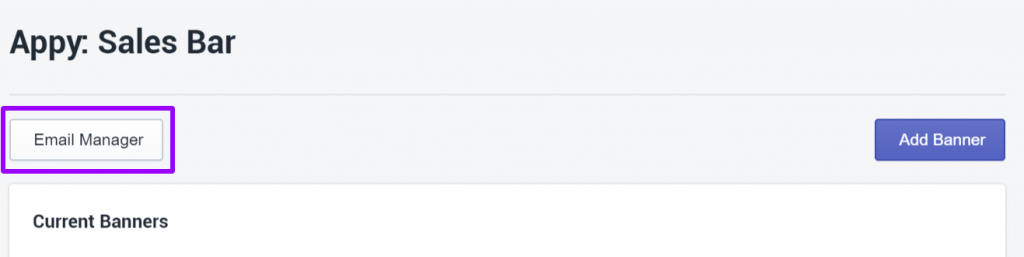
Once you are asking for email addresses, you will find all of your captured leads in the Email Manager on the homepage of the app. Click the button to see your captured information and you can also export them to your favourite email software.
We are working on automated integrations with the most popular email systems like Klaviyo, Mailchimp etc.
Targeting different pages (Premium Only)
If you have the premium version of the Sales Announcement Bar app you are able to choose what pages the banner will show up on. (The Starter plan shows on all pages by default)
1. Select the targeting method, there are three options to choose from.
- Starts with: will allow you to choose any banner that contains all the content from a URL after what you input. Example store.myshopify.com/collection will appear on every page with that URL at the start. So every collection page.
- Contains: will appear for any URL with the words you enter. For example, ‘products’ will show on all pages with the word products in the URL.
- Exact: this will only show up if the page matches exactly. It is important to include the trailing slash (/) if you choose this option.

Note: leave the text box blank to target every page.
Setting a Schedule (Premium only)
You can set a schedule for your banners so they automatically start and end at a designated time. This means you can have different messages, offers and promotions linked up together.
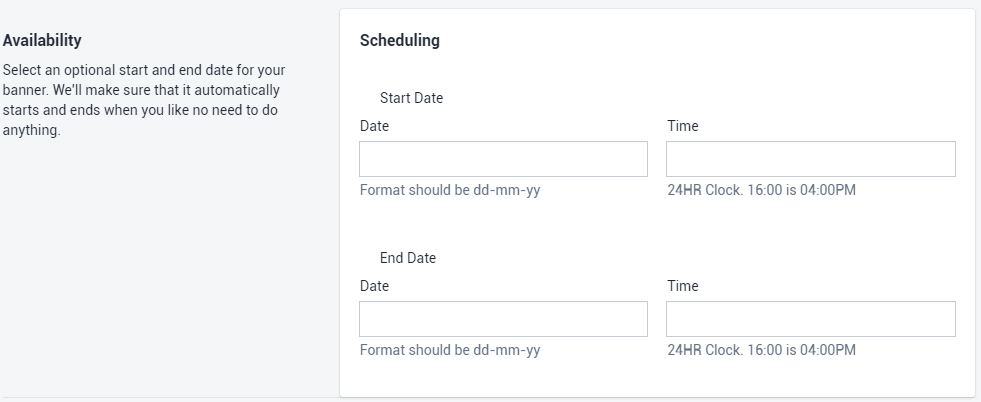
1. Choose an optional start date and time for your banner. This will activate the banner at the chosen time.
2. Choose an optional end date and time for your banner. This will end your banner automatically.
Note: leave it all blank for a banner which will start straight away and always be active.
That’s it! All that is left to save your banner.
