Creating a sale in Appy: Sales Discounts & Profit
Creating scheduled sales is how the Sales Discounts & Profit app is able to place your items on sale. The app takes a list of product you choose and talks to your store to automatically change the prices when the date you set passes.
On this page
Creating a Sale
Note: we can only change about approx 3000 variants an hour due to rate limiting on the Shopify API, less if you are also adding or removing tags to a product as well. Plan your start and end times to take into account the amount of products you have.
To create a scheduled sale, please follow these steps:
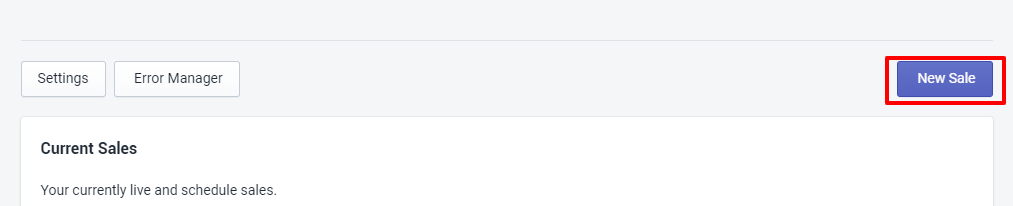
1. Log into your Shopify store and head to Apps
2. Select Appy: Sales Discounts & Profit from the menu
3. On the homepage, select Create a Schedule
4. Name your sale, something you can easily recognise. (Note: this is internal only)

5. Choose when you want the sale to run
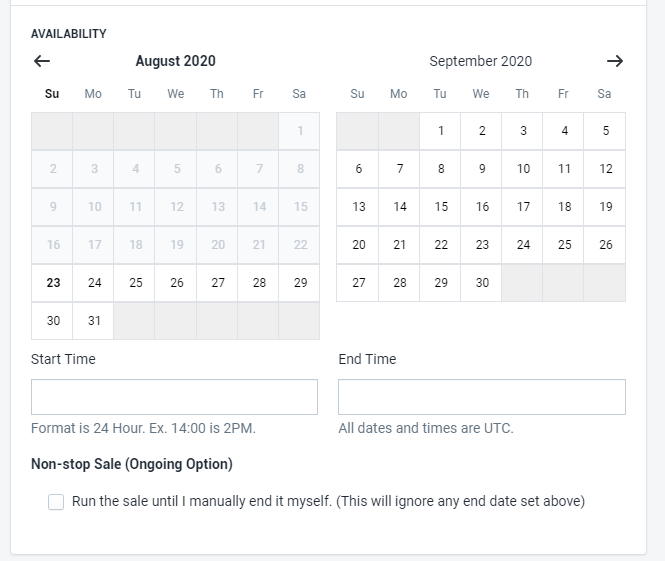
Start Date: Choose a start date from the calendar. Selecting no start date will automatically start the sale straight away.
End Date: Choose an end date from the calendar. If you wish a sale not to end until you manually choose to select the “non-stop sale” just below the calendar.

Note: All dates are based on UTC time.
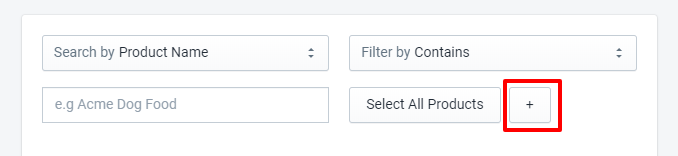
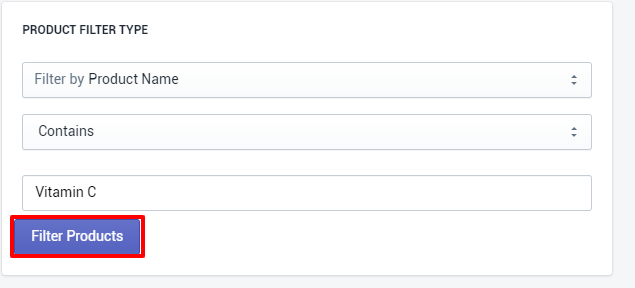
6. Search for the products you would like in your sale by using the filter

You can search in the following way:
- Product Name: The name of the product
- Product Type: The name of the type of product set in Shopify
- Product Vendor: The name of the vendor the product is attributed to.
- Product Tags: A tag associated with the product
You can select the way your filter in the following ways:
- Is: the words must be exactly the same as your search
- Contains: the selection can contain the words
- Is Not (Contains): the search must not have the selection
You can create more advanced searches by adding in additional fields which you can do so by pressing the + sign from the first filter.
Once you have created an additional filter field, you can choose the same different options above. It’s important to remember that all searches in the filter are considered AND which will mean all filters have to match.
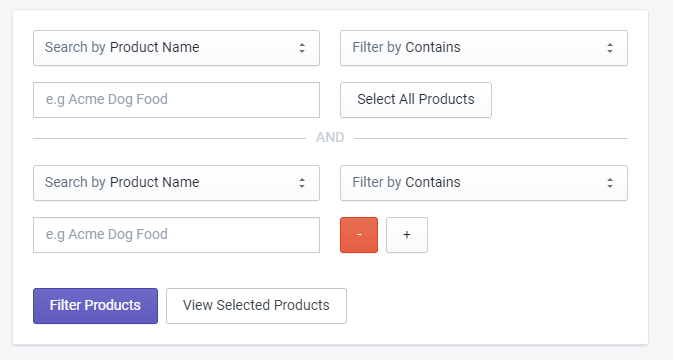
7. When you have created your selection criteria press, Filter Products to display the products that match your selection.
8. Choose the products you wish to include in the sale based on your selection in step 6-7.
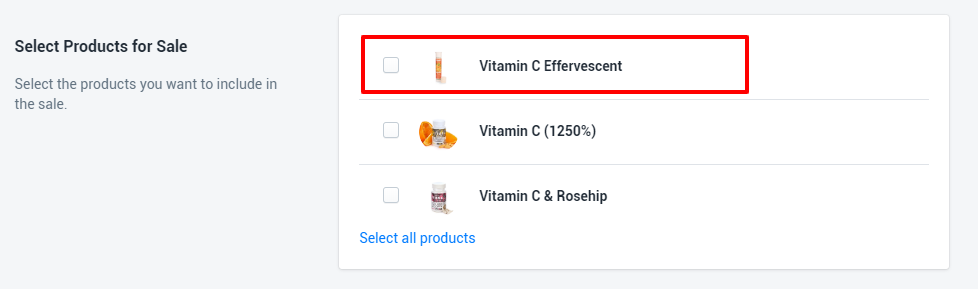
Note: our app does allow you to select individual variants. When a product has more than the default. It will be displayed twice on the list.
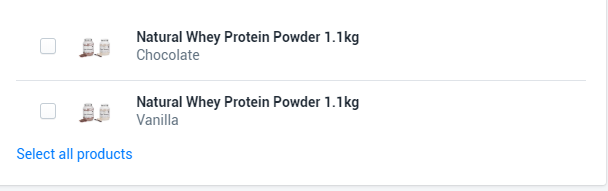
Each of the variant names will be displayed below the main product name in grey like the example shown above. You can choose to have just one variant in the sale or select all of them.
Selecting All Products
If you want to select all the products to put on sale then you can do so by pressing “Select All Products” from the first filter menu.

This will make sure that all your products are automatically selected minus any selection filters applied in the global settings menu such as excluding Recharge product or items without a cost per item set.
Note: You can still add additional filters on top of selecting all products which are great for excluding products.
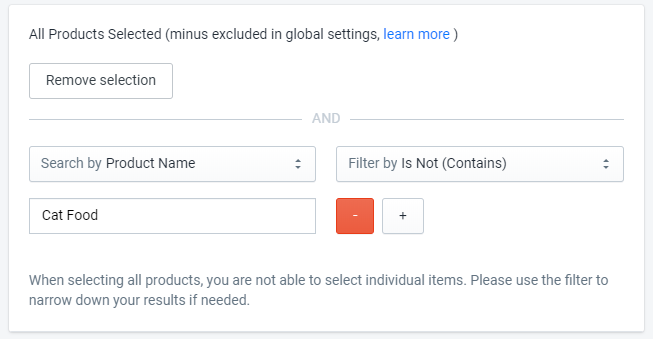
Important: you can’t select individual products when you have chosen to include all items. Use additional filters if you need to exclude certain products. You can also as ad_hidden to a product in Shopify which will auto exclude it from any search.
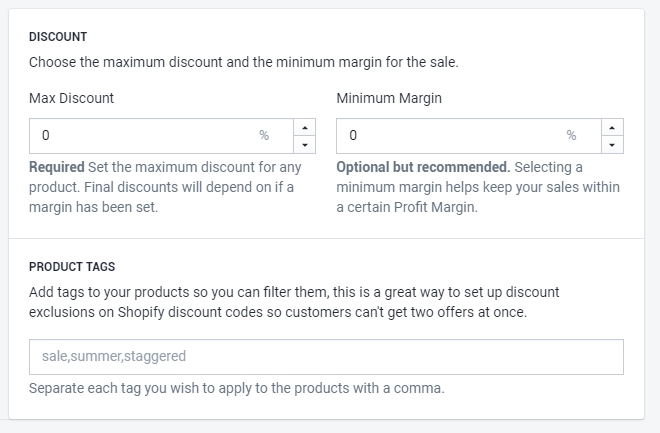
9. Select what the maximum discount can be for the sale.
Our app works differently from other discount apps. As we do not just blindly discount your products to the set price. We ask for a Maximum Discount instead of just a flat discount rate.
10. Select what the minimum margin is for your sale. This is where you set what percentage “profit margin” you want as a minimum for each product in the sale.
Important: we use the minimum margin to work out what the maximum discount can be without falling below what you set. If you do not set a minimum margin all products will be discounted to the max discount specified. To understand what margin is and why it’s important. Please read our What is margin and why it is important article.
11. Add tags to your sale optional tags to your sale.
Adding tags to your sale means you can create smart collections for that promotion. You can use it to create a daily deals page with offers changing each day or make a collection on the homepage to automatically promote items you wish to push.
Note: multiple tags can be included by comma separating each one.
12. Click Save
As long as everything has been inputted correctly, your sale will be saved and you’ll be taken back to the homepage where your new schedule will be.
If the sale has been scheduled for now it will start to run momentarily. If you have scheduled a sale to happen in the future you will see if marked as “Scheduled” until the time has passed.
Depending on the number of products, your sale could take up to 10 minutes or more to fully run.
After you’ve created your sale
Once you have created your sale you can view the products included in that sale and see the status of it, details about the sale price and margin and if you would like to end the sale.
You can read more about amending a sale or ending it.