Configuring VIP Program
VIP programs are a powerful way to incentivize customers to engage more with your store, increase their purchase frequency, and encourage higher spending per order.
The foundation of an effective VIP program lies in structuring the tiers strategically. Each tier should be designed to motivate customers to progress to the next level, creating a sense of exclusivity and reward. To maximize engagement, you should establish tier-specific benefits, such as stamps multipliers, exclusive perks etc. Additionally, incorporating tier-based stamp bonuses or extra perks ensures that customers perceive added value as they move up, reinforcing their loyalty and long-term commitment to your brand.
On this page
Setting up your VIP Tiers
When a store first installs our app, we set up some basic tiers (bronze, silver & gold) and the program is off by default. This is to allow you to set up your own if you wish before putting it live, or just going in with the basic right away.
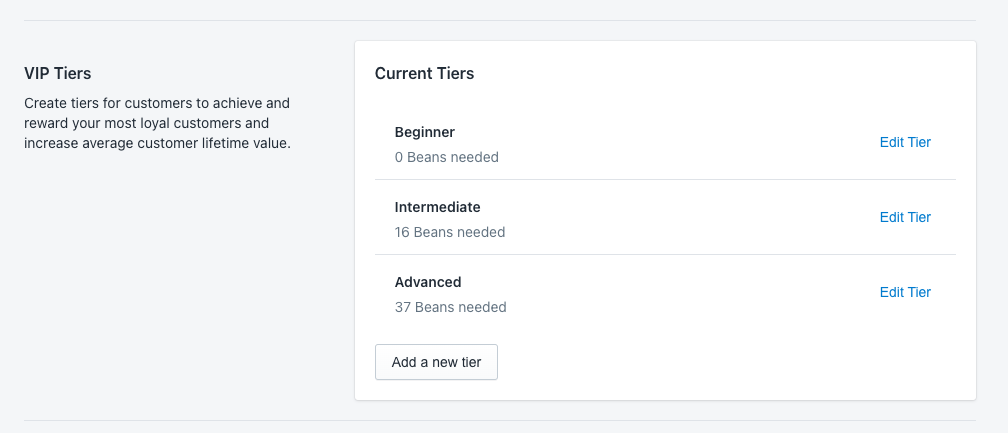
You can edit the names of these tiers and how many “stamps” are needed which is a good foundation to work off.
Adding a new tier
You can also add additional tiers, by clicking on the Add new tier button.
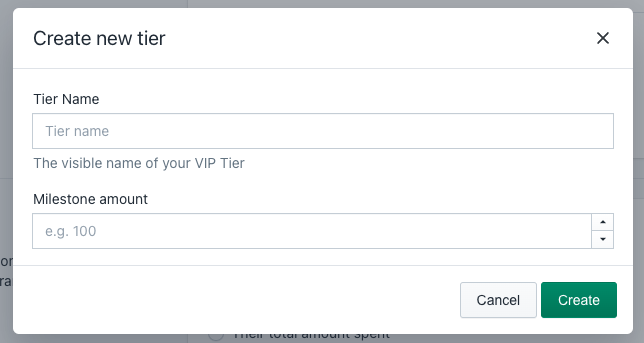
You can then give the tier a name, and which amount of stamps are needed to be entered into this tier.
Once you click Create, we will take you to the edit tier screen that we will explain next.
Editing a tier
If you create or edit a existing tier, you’ll end up on the edit tier screen which looks like this.

From here you are able to:
- Edit the tier name
- Edit the milestone (unless it is the entry tier)
- Adding a multiplier
- Add any rewards that customers can get
- Add additional benefits.
Changing the milestone
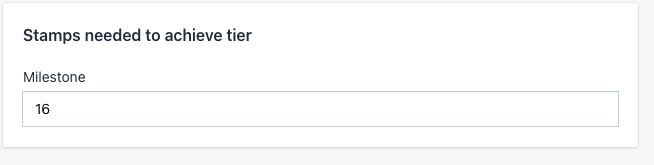
The milestone is needed for each new tier above the entry tier (which is set always to 0) so that we know when a customer is eligible for that tier. Once they earn enough stamps over a year period, we will place them into that tier.
Note: we work out their additions in earning over that period, so if you remove stamp from their account
Changing a multiplier
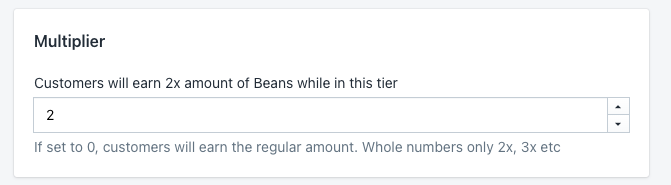
If you wish to distinguish the benefits of your tiers easily, you can add a multiplier so that customers in a certain tier can get more stamps per order. For example, your best tier “Gold” could allow customers to earn 2x the amount of stamps they would usually earn for placing an order.
Adding rewards to a tier
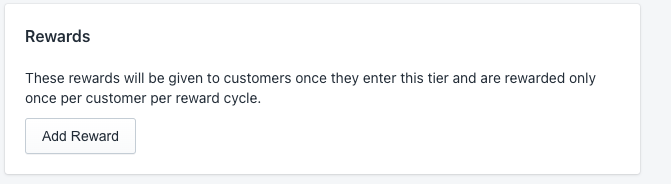
When a customers enters the tier for the first time, you can choose to reward them with specific rewards like a discount code, a free product etc. Any reward that you can make globally can usually also be added in here as a reward.
Customers will only earn them once when they enter.
Adding additional perks or benefits
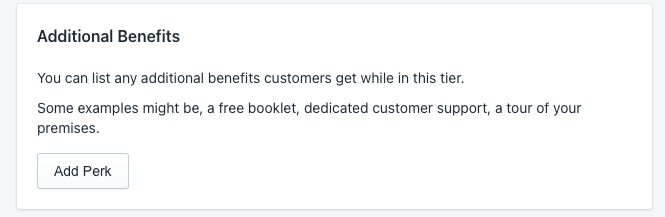
If you also want to add some other benefit that is not directly tied into the app, you can add it in the Additional benefits section. This is great way to showcase other rewards that might be external, like a VIP tour of your shop, a free taster session if you run a craft business etc.
Uploading your own tier icons
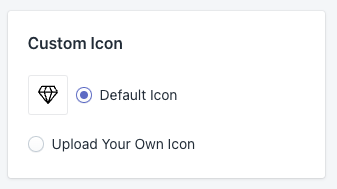
Finally, to give that extra bit of bling, you can if you wish upload your own icons. This is a great way to match your brand through our widget. If not, we will just display our default.
VIP Status
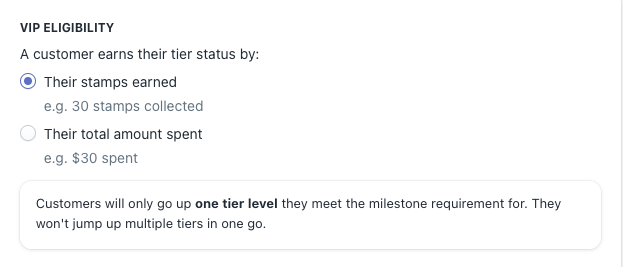
VIP Eligibility
This is where you select how a customer earns entry into a tie.
- How many stamps they have earned
- How much they have spent to gain entry
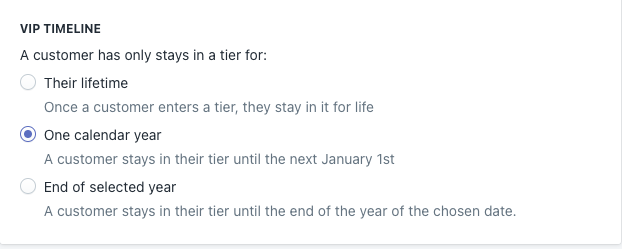
VIP Timeline
This is where you choose how long a customer stays in the tiers they are in. You can choose between lifetime, one calender years and end of selected year.
Common VIP questions
How many tiers can I have?
There’s no limit to how many tiers you can create, but we’ve seen that the sweet spot is around 3-5 tiers as too many might get too confusing or feel to much of a stretch to be in any decent tier.
Why can’t I delete the entry tier?
By default, there must always be a default tier that all customers go into. This is our entry tier and has a milestone of 0, so that every new customer gets placed into that one first.
Although you cannot remove it, you can change the name and any rewards but remember every customers ends up in this tier right away.